User or Identity management is most important and critical part of an application any minor loophole can be exploited by Hacker. Its big challenge and hassle for a developer to secure and maintain his application. Stormpath provides an ecosystem for user management, authentication and authorization for your application. As their tagline says “Never Build Auth Again” that mean developer don’t have to worry to build auth system to secure and maintain.
This post shows you how to use Stormpath Auth system with Spring Boot app. To get started we need put all the following dependency in our pom.xml
POM.xml
<?xml version="1.0" encoding="UTF-8"?>
<project xmlns="http://maven.apache.org/POM/4.0.0" xmlns:xsi="http://www.w3.org/2001/XMLSchema-instance"
    xsi:schemaLocation="http://maven.apache.org/POM/4.0.0 http://maven.apache.org/xsd/maven-4.0.0.xsd">
    <modelVersion>4.0.0</modelVersion>

    <groupId>com.dgstack</groupId>
    <artifactId>spring-stormpath-oauth</artifactId>
    <version>0.0.1-DEMO</version>
    <packaging>war</packaging>

    <name>spring-stormpath-oauth</name>
    <description>Demo Spring Oauth integration with stormpath</description>

    <parent>
        <groupId>org.springframework.boot</groupId>
        <artifactId>spring-boot-starter-parent</artifactId>
        <version>1.4.2.RELEASE</version>
        <relativePath /> <!-- lookup parent from repository -->
    </parent>

    <properties>
        <project.build.sourceEncoding>UTF-8</project.build.sourceEncoding>
        <project.reporting.outputEncoding>UTF-8</project.reporting.outputEncoding>
        <java.version>1.8</java.version>
    </properties>
    <dependencies>
        <dependency>
            <groupId>com.stormpath.spring</groupId>
            <artifactId>stormpath-default-spring-boot-starter</artifactId>
            <version>1.0.RC9</version>
        </dependency>
        <dependency>
            <groupId>org.springframework.boot</groupId>
            <artifactId>spring-boot-devtools</artifactId>
            <scope>runtime</scope>
        </dependency>
        <dependency>
            <groupId>org.springframework.boot</groupId>
            <artifactId>spring-boot-starter-tomcat</artifactId>
            <scope>provided</scope>
        </dependency>
        <dependency>
            <groupId>org.springframework.boot</groupId>
            <artifactId>spring-boot-starter-test</artifactId>
            <scope>test</scope>
        </dependency>
        <dependency>
            <groupId>org.springframework.boot</groupId>
            <artifactId>spring-boot-starter-security</artifactId>
        </dependency>
    </dependencies>
    <build>
        <plugins>
            <plugin>
                <groupId>org.springframework.boot</groupId>
                <artifactId>spring-boot-maven-plugin</artifactId>
            </plugin>
        </plugins>
    </build>
</project>
RestSecurityWebAppConfig.java
This Adapter class is main class where we are going to configure our secure route or URI. In below code, we are configuring all URL except / root which hae to go through the security check by stormpath.
@Configuration
public class RestSecurityWebAppConfig extends WebSecurityConfigurerAdapter{
    @Override
    protected void configure(HttpSecurity http) throws Exception {
        http.apply(StormpathWebSecurityConfigurer.stormpath()).and()
            .authorizeRequests()
            .antMatchers("/").permitAll();
    }

}
IndexController.java
This rest controller or rest API free to use or we can say it a public API and user don’t need to be authenticated by stormpath.
@RestController
public class IndexController {

    @RequestMapping("/")
    public String index(){
        return "Hello World !";
    }

}
SuperHeroController.java
This rest controller or rest API is secured by stormpath auth. Before getting output from this API user should be authenticated.
@RestController
public class SuperHeroController {

    private String[][] data = {
                {"SpiderMan", "SuperMan", "BatMan", "Flash"},
                {"peter@mail.com", "clark@mail.com", "brue@mail.com","barry@mail.com"}
            };

    @RequestMapping("/superhero/{id}")
    public SuperHero getStudent(@PathVariable("id")int id){
        return new SuperHero(id, data[0][id], data[1][id]);
    }

}
SpringStormOathApplication.java
This is SpringBootApplication class bootstrap our app and run it in an embedded tomcat.
@SpringBootApplication
public class SpringStormpathOauthApplication {

    public static void main(String[] args) {
        SpringApplication.run(SpringStormpathOauthApplication.class, args);
    }

}
application.properties
This properties file contain all the required properties to communicate with stormpath auth service.
stormpath.application.href = https://api.stormpath.com/v1/applications/mFKrkiWGyI1t0Gpq638oo

stormpath.apiKey.id= 6LA4SVLABEN6RZS259KEVANR2
stormpath.apiKey.secret = L/ZtZUHrYWKDm6FP6/OCHAP6TdlmyvliT/77Ea+F+7s

stormpath.client.apiKey.id= 6LA4SVLABEN6RZS259KEVANR2
stormpath.client.apiKey.secret = L/ZtZUHrYWKDm6FP6/OCHAP6TdlmyvliT/77Ea+F+7s
The values of above properties will be diffrent in your case as you need to create an account at Stormpath.
Stormpath
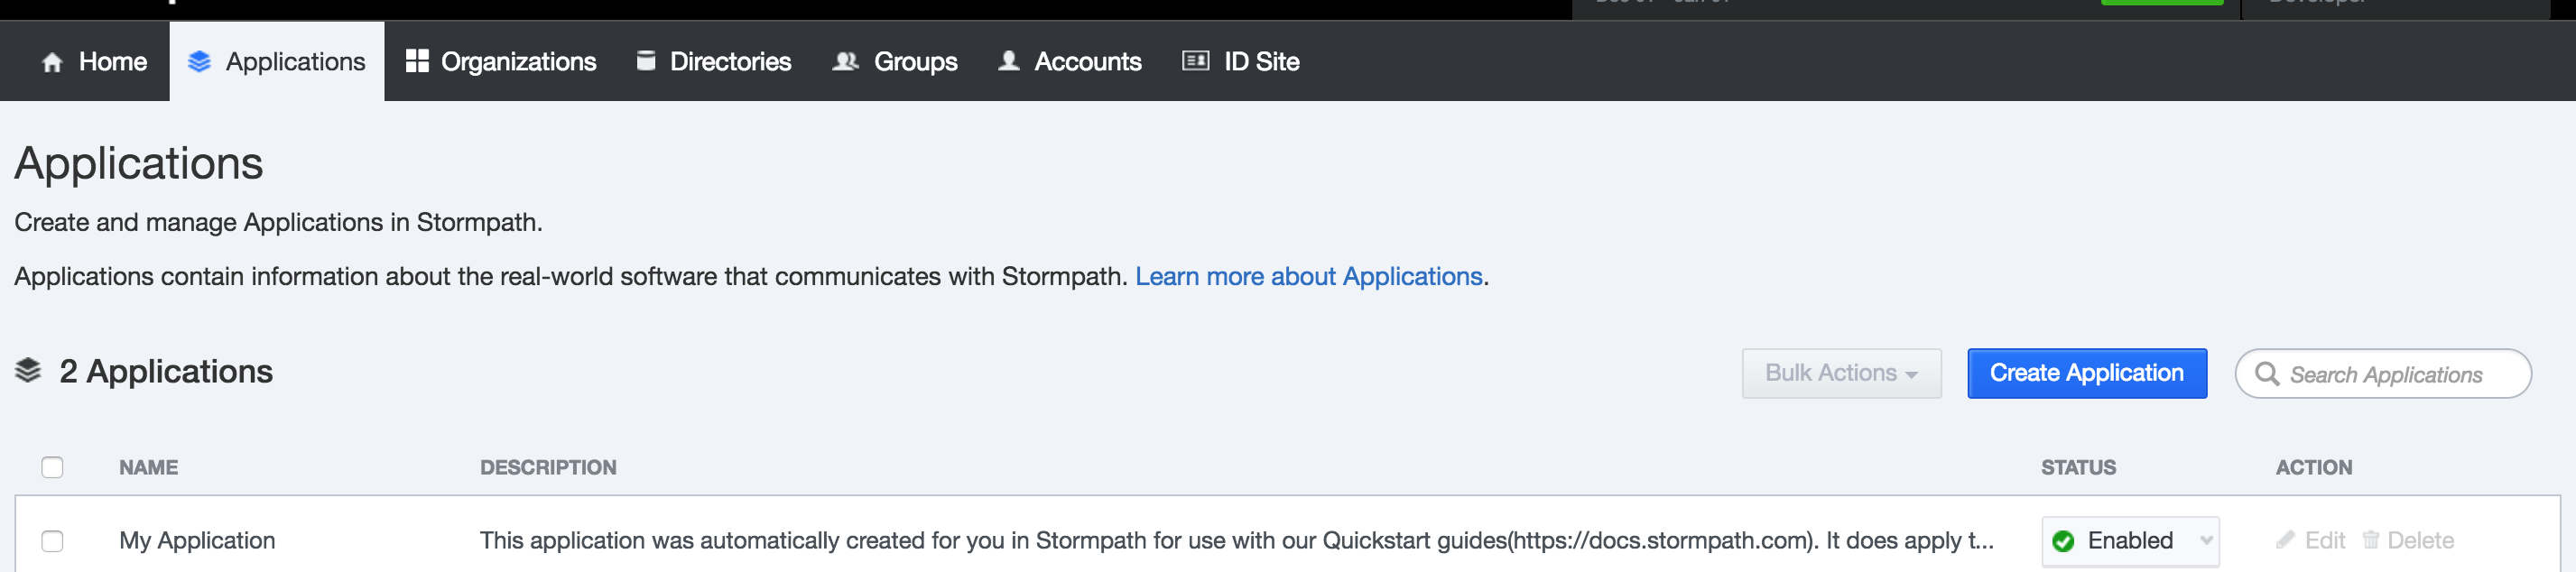
First we need to create an account at Stormpath after that you landup at following screen (dashboard).

Then click on the Application Tab on that screen click on Create Application button then a form will appear to fill the required information and submit.
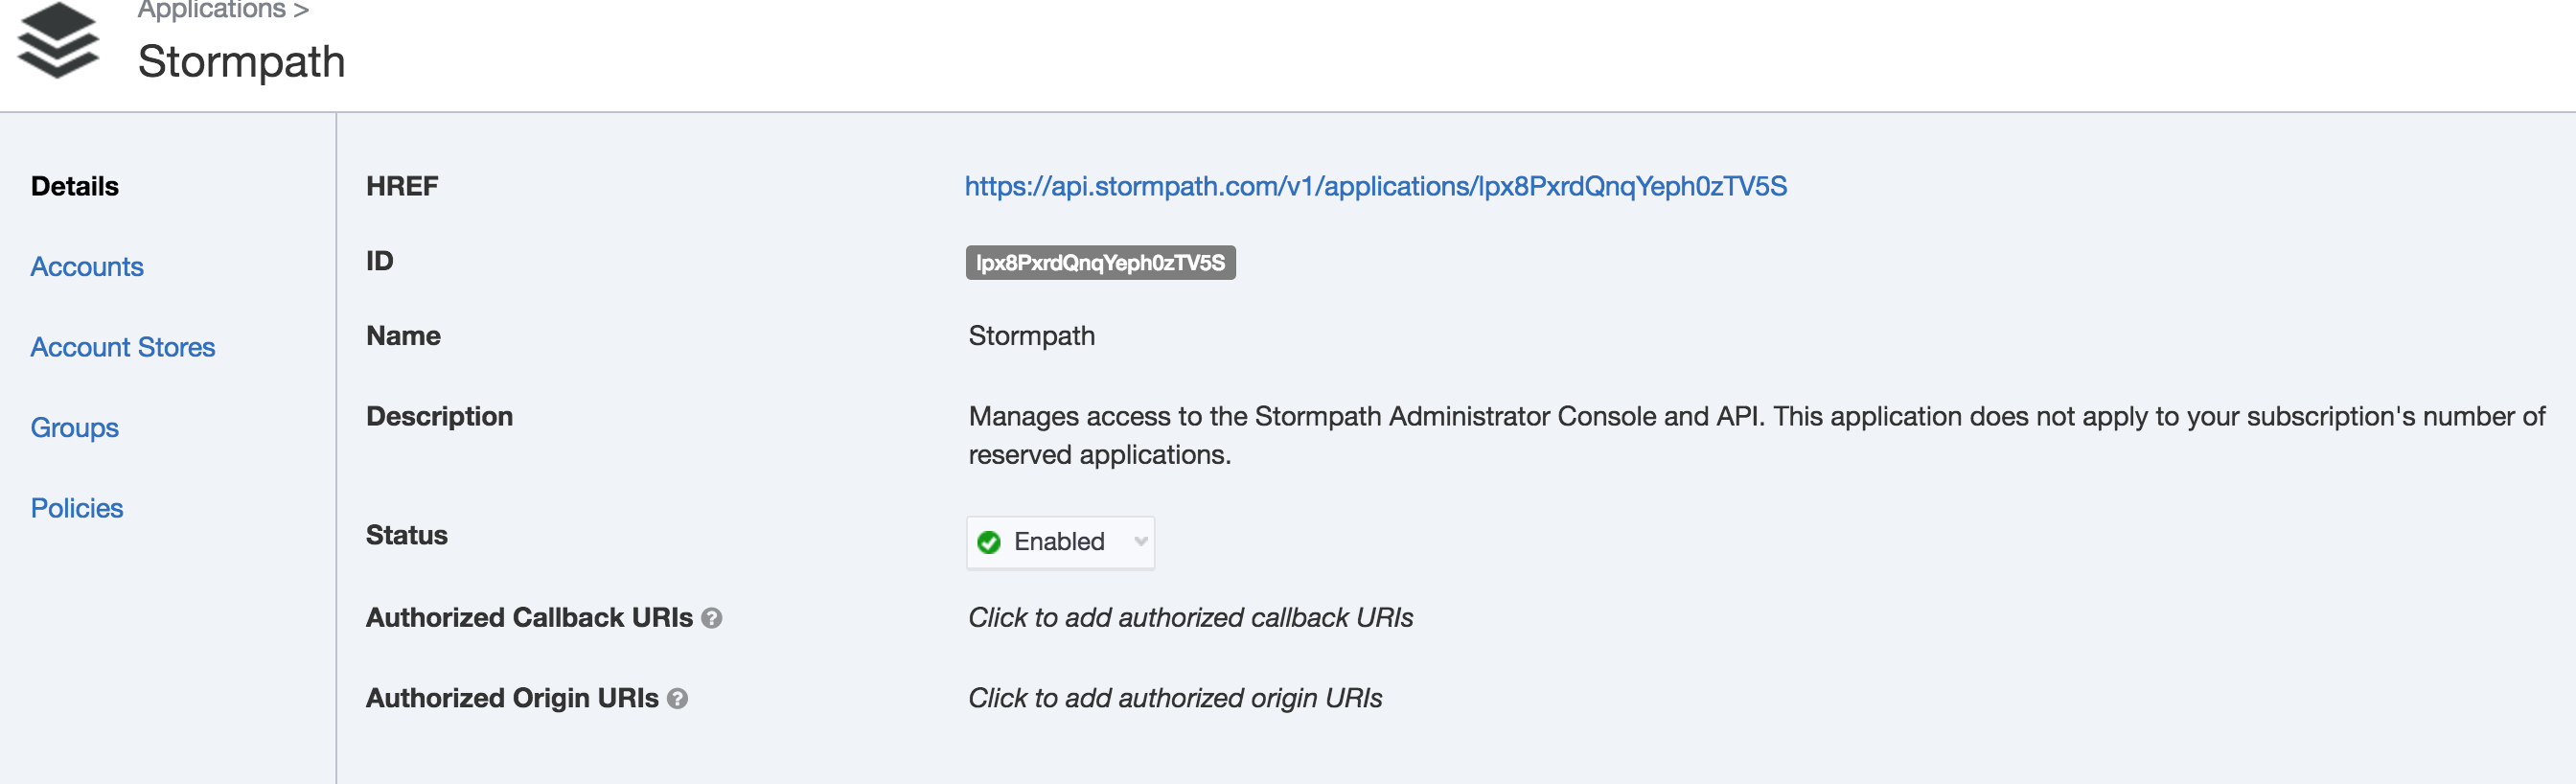
After create our app you will get stormpath.application.href properties value. Now we need an account to access this app via apiKey.id and apiKey.secret as we make OAuth authentication for this app.
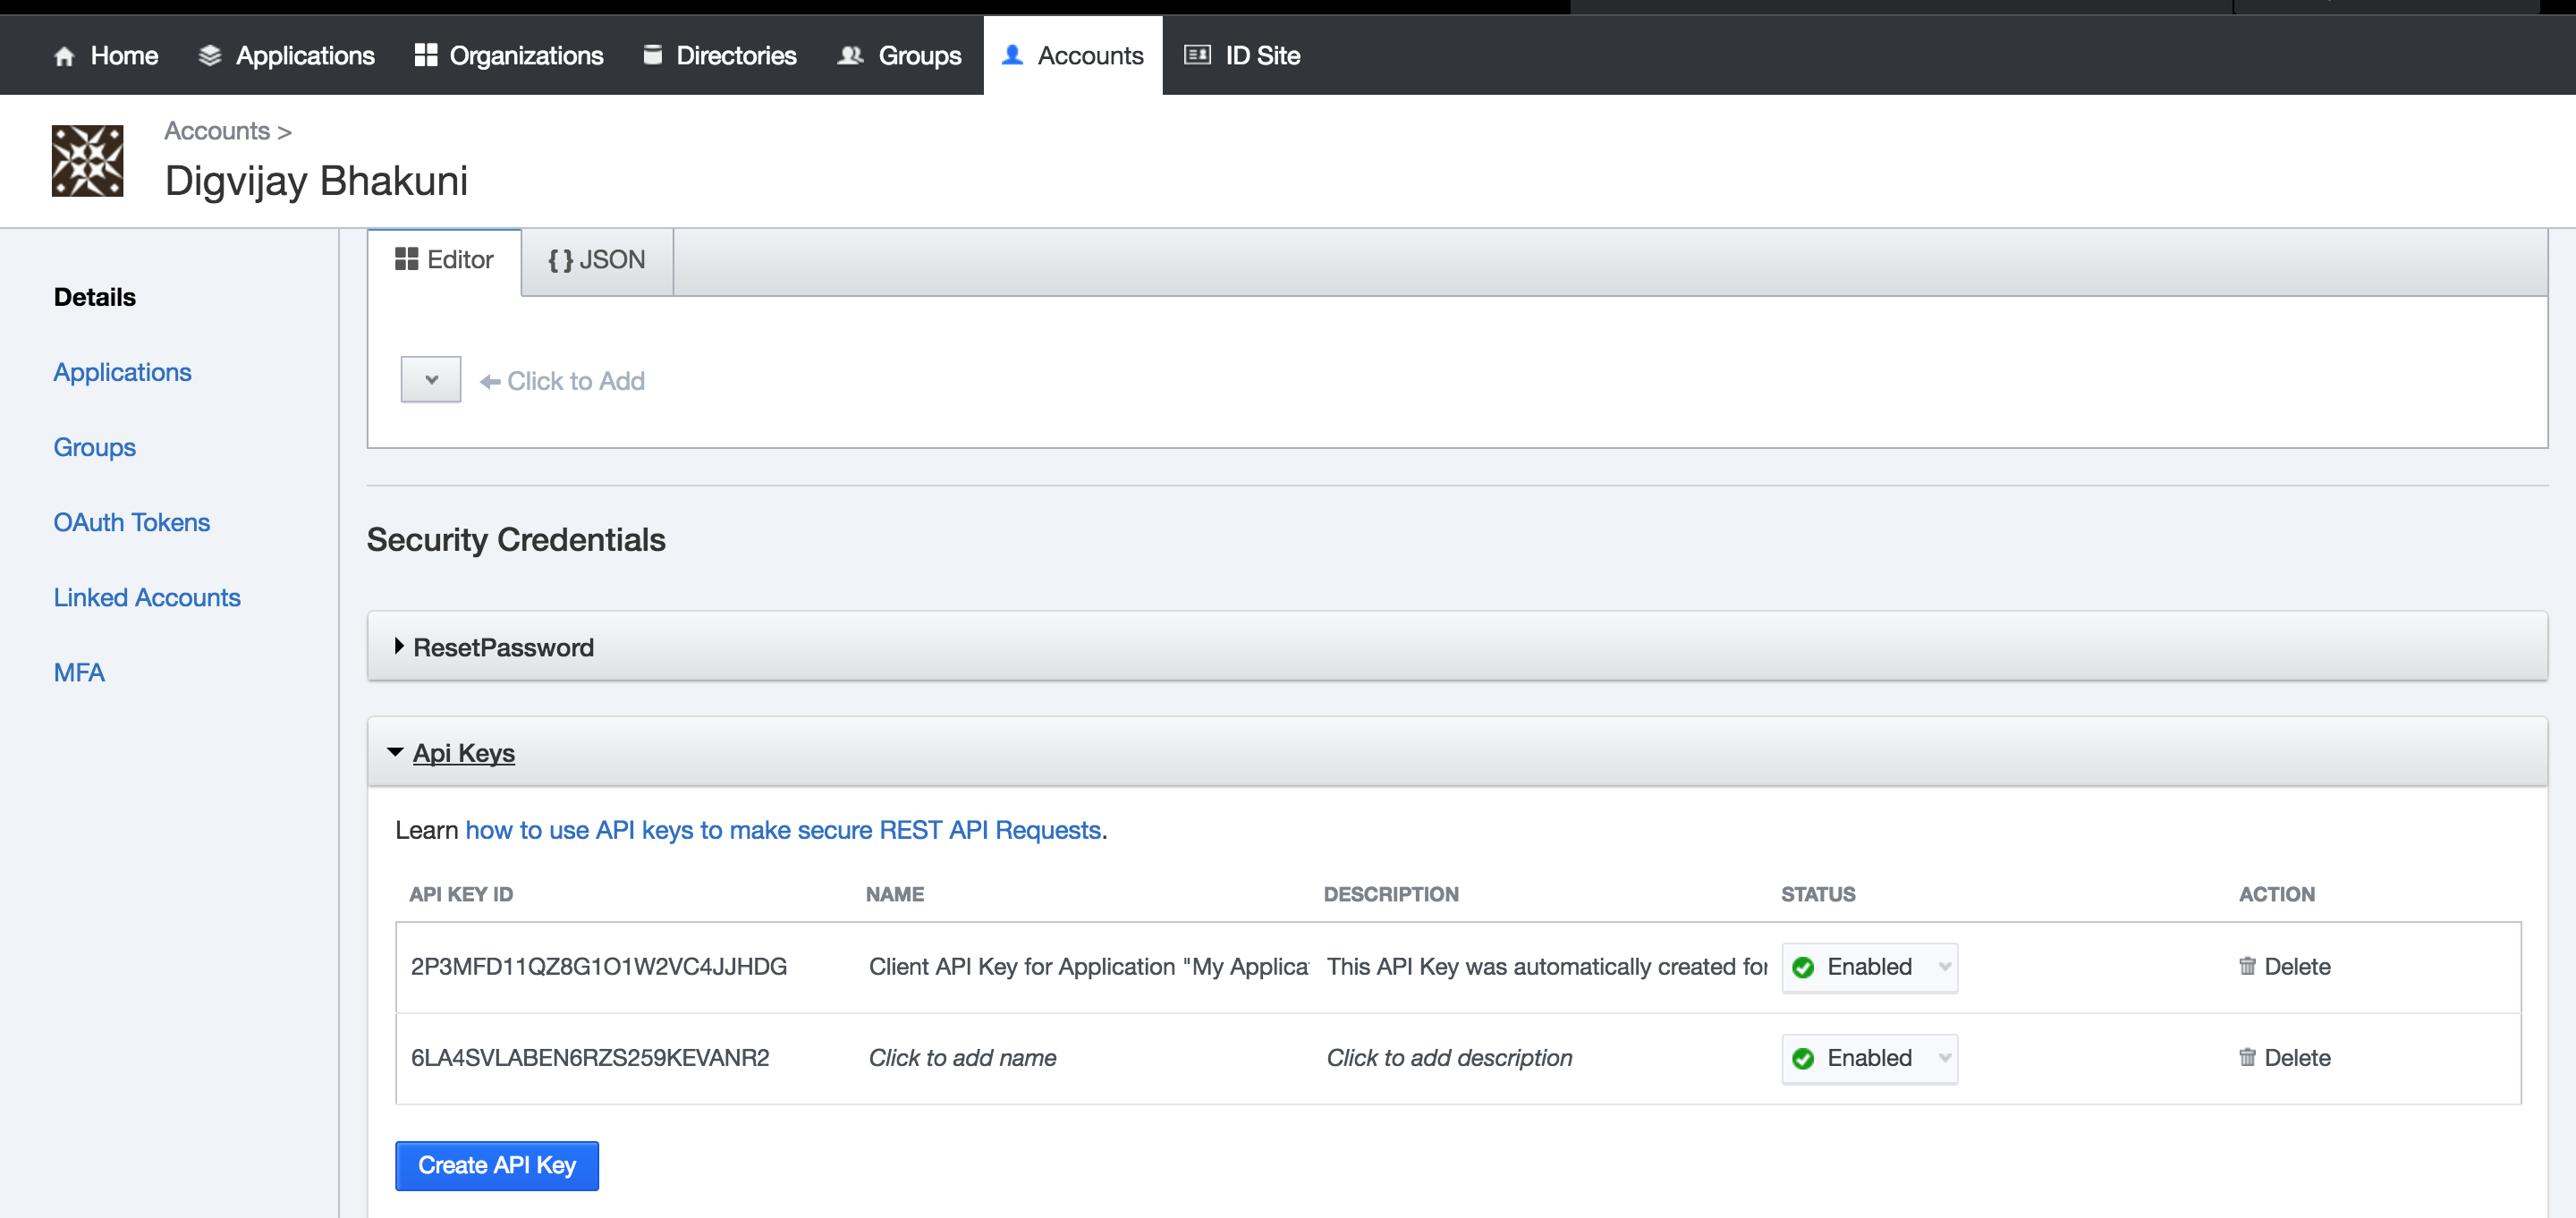
Now click on the account tabs you see there an account would already create that is an account you logged into stormpath.com. As you can see in below screenshot I have also created some other account to test as we going to use some of these accounts to login to our own app. But we will create apiKey.id and apiKey.secret from our stormpath login account in my case it is Digvijay Bhakuni it is also a Stormpath Admin account.

Click on user account and scroll right to the bottom of screen under details you will find a button Create API Key as you click on that button a properties file will download to your system having you apiKey.id and apiKey.secret copy and paste the values to your application.properties file.
Now we are good to go navigate to project root in terminal then enter mvn spring-boot:run
This account is similar what we have as Login as Google Account. Suppose if we want add login via Google in our app then we need to have a google developer account which provides an
apiKey.idandapiKey.secret. This is basic concept of OAuth where “Internet users to authorise websites or applications to access their information on other websites but without giving them the passwords” therefore we don’t need to manage user account, stormpath will do it for us.
Running App
Now open your browser and open the app you will be able to access root as it is not secure by stormpath. But when navigate to http://localhost:8080/superhero/1 and this is secure URL you will be redirected to login page.
You can login with any account you have created in stormpath dashboard or you will even find Sign Up button.
Doing Rest OAuth
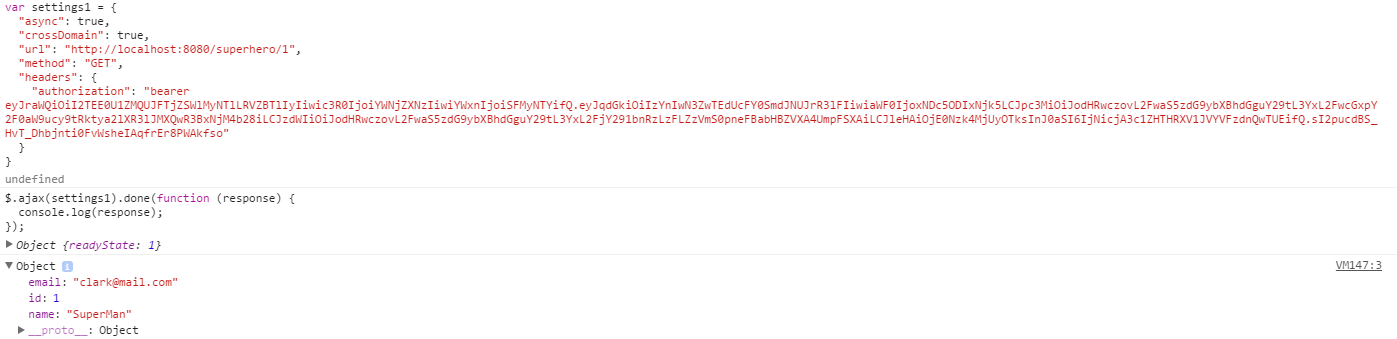
To login rest style if we create rest API then client is not going to use web UI to authenticate and consume your API. Therefore I have create this with javascript client in the underlying screenshot.

This is the probable way you are going to use it in SPA (Single Page App).
Now you got the token in response JSON as access_token you can pass it under Authorization header like bearer <token_value> to access secure API.
Decoding Token
With Stormpath we are using JWT (JSON Web Tokens) therefore we can decode it at jwt.io.

Subscribe & Social
Subscribe to this blog via RSS.
Recent Posts
-
 Posted on 19 Jul 2018
-
 Posted on 31 May 2017
-
 Posted on 11 Jan 2017
-
 Posted on 09 Jan 2017
-
 Posted on 02 Dec 2016
Categories
Java 14
Python 2
Ops 3
Shared 3
Angular 1
Web 1
Popular Tags
Java (14) Python (2) Wordpress (1) Ops (3) Angular (1) Web (1)